Showing posts with label Rebreather Diving. Show all posts

Tuesday, 18 August 2015

O2 Cell Lifetimes and the Importance of In-Dive Validation Checks

The importance of both regularly changing O2 cells and carrying out in-dive validation was evident made on a recent mixed gas dive in Anilao.  The dive in question was done using a JJ-CCR with 3 cells that were just over 16 months old – normally I’d only use cells under, or very close to, 12 months – however due to a ‘technical issue’ (aka forgetting to bring the counterlungs for my HH unit!) I chose to use the available JJ over the other option of a 6 hour round trip to Manila to pick-up the HH counterlungs.  I should also point out here I am certified to use a JJ and it is a unit I’m familiar with :-)

The dives were originally scheduled for July with some our Trimix course graduates, however we were forced to reschedule when typhoon “Falcon” (International name “Chan-hom”) passed close to the East coast of the Philippines, bringing with it rough conditions to the West coast.  Even with the dive entry direct from shore we opted it was better to delay the dives to another time rather than push through with a long dive while the waves were getting bigger by the hour.

Picking the right conditions for the dives and finding a time in which we were all available (myself, a course director based out of Cebu and an instructor based out of Manila/Anilao) brought us to Friday 14th to Sunday 16th August to complete the dives and extend the Acacia deep line a little further.

All gases were already blended and ready from the previous planned dives in July and we had a perfect window with tides to complete the dives. Given the circumstances and the fact that I’d previously used cells up to 18 months on different units with no problems I felt the risks involved with using the older cells could be countered with the caveat that I’d perform regular validation and verification checks on the dive and bail-out if I did not feel comfortable with any results.


Having completed all pre-dive checks on the JJ all seemed fine, the unit was already reading 0.21/0.22/0.21 on all cells before calibration, during calibration the 3rd cell seems a little slow to react compared to cells 1 and 2, checking the mV reading it was showing just under 43mV for O2 which seemed a little low (the other 2 cells were reading around 49 and 48mV) – given the slow reaction I decided to recalibrate the unit and found the same results, all cells also returned down to linearity when exposed to air (0.22, 0.21 and 0.22 as I recall).  Another set of pre-checks followed and the unit seemed ready to dive.

The output from the primary handset is shown below:

During the first dive our planned depth was 110m, the aim being to confirm the line was still in place and ready the end spool for a extension down to 130-140m the following day.  With the lower mV reading on cell 3 I wanted to check linearity at a PPO2 of 1.4 and above so confirmed all 3 cells could reach 1.6 PPO2 at the start of the dive (line 0 on the shearwater output).  During the initial descent (between lines 0 and 1 on the shearwater output) I noticed the third cell was consistently a little lower than the other two, but just inside the 20% deviation needed to be voted out by the Shearwater electronics – I normally fly all rebreather in manual mode with the electronics set as a back-up at 0.7 or 1.0 PPO2 in most cases so this wasn’t of immediate concern, however I wanted to check it stabilised for decompression info during the dive.

The plan was to use scooters to make the initial swim easier (and quicker for the divers using OC) from shore to the steep drop-off (around 100m distance from shore), we dropped the scooters at the top of the steep drop off at a depth of 60m, this gave me a chance to validate the cell readings – adding O2 to spike the PPO2 to above 1.4 now resulted in the 3rd cell, previously showing the 20% lower PPO2, now jumping to a PPO2 of 1.7 while the other two cells showed 1.4 (line 1 on the Shearwater output) – I was worried at this point that it could be that the other two cells were faulty and the 3rd cell the most accurate, however adding diluent to bring the PPO2 back down showed the 1st and 2nd cells reacting much faster while the 3rd cell didn’t seem to change, responding very slowly and much less than would be expected for the amount of diluent added to the vented loop.  By this time I was almost certain the third cell was at fault and cells 1 and 2 were giving me correct reading, to confirm this I vented the loop and filled with diluent through the descent to 110m, checking the PPO2 did not fall below the diluent PPO2 for that depth (I was using a 9/65 diluent so checking the PPO2 didn’t fall below 0.1 x the pressure works as a quick check – the wonder of metric units!).

Through the descent cells 1 and 2 behaved as would be expected, but yet the 3rd cell continued to react slowly and tended to ‘stick then drop’ rather than a constant drop of PPO2 that occurred each time diluent was added on cells 1 and 2.  This well and truly confirmed the 3rd cell faulty, I just wanted to confirm the 1st and 2nd cells were working as planned.  To err on the side of caution I kept the 3rd cell reading below a PPO2 of 1.6 and let cells 1 and 2 drop to a PPO2 of 0.8/0.9 – the solenoid was set to fire were set to kick-in at a PPO2 0.7 and given the depth being over 100m at this point I wasn’t too worried about the lower PPO2 until the cells could be verified (my back up computer was set to a constant PPO2 of 1.0 until the ascent).  Once we had completed the adjustment of the spool and set-it up for the next dive I made a diluent flush on the ascent to check the cells responded, the PPO2on cells 1 and 2 rose slightly to just over 0.9 (very slightly lower than the actual diluent set-point at that average depth), while the 3rd cell showed the PPO2 increasing well above 1.6 when additional diluent was added.  I was now confident cells 1 and 2 were giving good information, and that cell 3 was giving completely wrong information – by this time the 3rd cell was voted out (as it had been since the 60m check on the descent) so the primary handset was controlling everything as planned.

The ascent continued as planned (with one delay at around 65m to adjust and re-secure the existing line placement), I wanted to keep an average PPO of 1.2 above 60m on the ascent so did this manually using the readings from cells 1 and 2.  The 3rd cell was still way above the readings on cell 1 and 2, until I carried out another cell check at 36m by adding O2 to spike the PPO2 above 1.4 (line 3 on the Shearwater output), at which point  cells 1 and 2 spiked as planned while the 3rd cell only increased slightly in PPO2 (bringing it back into 20% of the average and therefore no longer being voted out).  The next few deco stops then see the PPO2 of cell 3 drop slower than in cells 1 and 2, leading to cell 3 hovering just under 20% above the cell 1 and cell 2 reading – ie not voted out(between lines 3 and 4 on the Shearwater output).

To make sure the output of cells 1 and 2 wasn’t voltage limited I spiked the PPO2 back up to above 1.4 at 24m (line 4 on the Shearwater output) which brought all 3 cells close to 1.6 again, after this point the cell reading stayed quite close, until the cell 3 PPO2 suddenly dropped at around 73 minute of run time, I did another small PPO2 spike to check cells 1 and 2 weren’t frozen but found both responded as expected while cell 3 had almost frozen at a lower PPO2.  The lower starting mV reading for cell 3 meant that once again it was just hanging in there at 0.25 below the other cells and was not voted out again until around 10 minutes later when it dropped more than 20% outside the cell 1 and 2 readings.

By the end of the 6m stops on both computers I now had two quite different decompression profiles, my primary handset was showing over 40 minutes (I think it was 43) at 3m while the back-up (also a petrel but set to a fixed PPO2 of 1.0 initially then 1.2 after 60m on the ascent) was showing just 23 minutes. Given the problems with cell 3 and the fact the cells were older I thought it was best to finish off the dive on OC O2 which also brought down the total time needed at the final 3m stop (I switched to OC bail-out on 100% O2 a line 7 of the Shearwater output, the majority of the OC stop was then done at 4.5m as you can see).  After switching to OC I vented the loop via the counterlung OPV dump (line 8 on the Shearwater output), the JJ ADV is very sensitive and a little diluent entered the loop as I was venting - as soon as this happened I noticed that the reading for cell 3 increased suddenly while cells 1 and 2 dropped as expected.  Even during the OC part of the dive you can still see that the 3rd cell reading jumps around a lot.

We finished the dive by clearing both computers on OC bail-out (both were petrel controllers dived at GF 25/85), I was just a little surprised how much impact the faulty 3rd cell appeared to have on the decompression times – this seems to be an ‘unlucky’ profile as the 3rd cell seemed to have a funny habit of landing about 19.5% away from the other cells so didn’t quite get voted out.

Obviously there is a very high chance that all of this could probably have been avoided by having fresh cells after 12 months, however the way the cell behaved was something I had not seen before while ‘standard’ pre-dive checks and a validation PPO2 of 1.6 at 6m at the end of the dive wouldn’t have shown anything out of the ordinary.  The fact the cell behaved normally, then gave an artificially high reading at depth and an artificially low reading at mid-range before returning to near alignment in the shallows and finishing off with any slight change in PPO2 (increase or decrease) being exaggerated was a new one for me.

In summary two lessons learned, don't use cells past the recommended 12 months and secondly never under estimate the importance of in-dive cell validation through out the dive - hitting 1.6 at 6m does not validate the whole dive!

Sunday, 22 March 2015

Colour Coding of Standard Gases

We've decided to start using a colour coding system for all of our decompression and bail-out tanks as part of our annual stage tank overhaul.

The intention of this isn't to use the colour coding underwater, but to make visual recognition of tanks much easier on the surface, especially then having tanks passed town from boats on while donning tanks at the shoreline.

The colour coding also provides a quick visual reference underwater (we only used colours at the end of the visual spectrum - i.e. black, white, greens and blues).

We normally use standard gases for all our courses;

Black on White - Oxygen for Decompression from 6m upward
White on Black - 50% Nitrox for Decompression from 21m upward
White on Blue - Trimix 18/45 from 67m upward
White on Green - Trimix 10/70 from 130m upward.

The only other standard gas we use tend to use for decompression is Trimix 35/25 which we tend to make specifically for dives rather than have as a pre-filled standard gas.


Monday, 14 July 2014

Modifying my BMCLs for the Hammerhead Extreme CCR

I've started to make a few adjustments to my new Hammerhead CCR this week, in general the unit works a dream; but one minor concern I had is that the unit doesn't breath well as you move to a head down position due to air becoming trapped in the bottom of the lungs and not being able to reach the shoulder mounted T-pieces.

I don't really plan on being in a head down position too often, however wreck or cave diving can often require this and I didn't like the idea of restricted or unbreathable operation when more than likely being in a restriction.


Hose wraps on BMCL T-pieces
The modification suggested by Randy from SubGravity was the addition of the standard scuba hose wraps into the the lungs.  I actually didn't dive the unit without the wraps inside the lungs so can't comment on any improvement but I felt the sharp edges of the wraps could increase the risk of puncturing the lungs, while the performance with the wraps still made breathing slightly more difficult when horizontal and noticeably difficult when orientated head down.

I wanted something softer inside the lungs that gave a greater opening area to keep an airway between the t-pieces and the bottom of the lungs, initially I was thinking of a 1 inch diameter chemical braided hose (like a large diameter hose pipe) but was a little worried about the effect on minimum loop volume - a long length of large diameter hose would create quite a bit of dead space which I didn't want to carry in the lungs.  The hose also needed to be soft enough to not interfere with the lungs or risk damage, but firm enough to avoid collapse when under a negative pressure in the lung.


Standard firm garden hose with holes
I weighed up a few different options and had intended to try two or three different options, namely a standard garden hose, a slightly larger hose and the larger 3/4 inch hose.  My final choice was just to go with the garden hose as the hardware store nearby only had that in stock unless I bought the full 20m hose!  I had two choices, soft or firmer and went for the firmer hose type.

I cut the hoses to reach from the t-piece to around 10cm/4" from the bottom of the lungs - this could mean I couldn't quite work them at absolute minimum loop volume but was willing to sacrificial that to avoid the end been sealed or increased risk of water in the hoses.

To stop water entailment from the bottom of the lungs into the breathing loop, and to allow gas movement from anywhere in the counter lung, I drilled several large holes in the hoses.  I had originally intended to drill more larger holes but found they made the hose shape more flexible and was concerned the hoses could close up and reduce the breathing area when under a negative pressure in the lung.


Hose connection on BMCL T-piece
The hose was then tied using a cave line with two half hitches to the counter lung t-pieces, keeping the hose and as close as possible to the t-piece connection.

Performance wise I definitely noticed a significant improvement in the work of breathing when fully horizontal, head down was still noticeable harder to breath but it did prevent the complete close-up of the lungs - although the breathing resistance was still very high.

I've since added a second hose to each counter lung to double the hose opening are, the second hose was added in the same way as the firs.  Adding the second hose seems to line up well with the t-piece water trap openings.

I've not yet had a chance to dive the unit with the second hose so can't compare performance, however I'm hoping there's a further improvement - logic would suggest breathing should be easier again given the increased hose sectional area in each lung.  Sadly I don't think I'll get a chace to dive the unit again for almost 2 weeks due to other commitments but as soon as I do I'll give an update on how it works!


Wednesday, 2 July 2014

Hammerhead Extreme CCR


Like many things in life, a lot of things in diving seem to go in circles.  Not quite the full circles where we all go back to snorkels and weight belts but small circles where you decide on a different direction and slowly end up realizing where you were earlier was actually much better.


Early CCR days
Both myself and Matti actually took our first CCR course on the (exact) same unit under Tomas Morato; the Hammerhead Classic rebreather.  That was quite a few years back now and since then I’ve gone through learning on, and owning, a few different units including the ever versatile JJ-CCR (the good), the mistake of the Hammerhead Inspro (the bad) and the UTD MX Rebreather (the ugly).


Monster CCR days
None of the units I mention above seemed to have the invincibility I felt with the Hammerhead (and also saw in the Meg), nor could they offer the larger scrubber times I always had in the back of my mind for those bigger dives we’re always planning (not planning, we definitely need to get more focus on the doing this year!).  Sadly, the big draw back for me with the Hammerhead and the Meg was always the over the shoulder counter lungs – having dived a few different back mounted counter lung units I was already 100% sold on this concept and had no intention of going back to over the shoulder lungs.


JJ-CCR for sale?
The halleluiah moment for me arrived in February 2014 through Mathew Partridge, ironically here to run through the JJ-CCR course with myself and Alex.  Mat had just been contacted by Subgravity about becoming an instructor trainer for the Hammerhead unit.  We had a 2 hour or so drive down to Anilao from Manila and spent a lot of the time talking about the Hammerhead, the real highlight for me been that Subgravity would be releasing the unit with back mounted counter lungs as a standard option – the excitement of hearing this was perhaps not as obvious as it should have been, the fact I’d just spent several thousand Euros on a JJ-CCR unit I already knew I would soon want to replace probably helped keep things in perspective.


Matti in KL Airport with 'the goods'
Fast forward to May 2014 and a lot of USD later, myself and Matti are the proud owners of 2 shiny new Hammerhead Extreme CCR units – some of the first new units off the production line and fully fitted out with the back mounted counter lung design.  The units arrived in Malaysia which gave Alex and Matti the perfect excuse to visit the MIDE dive show in KL while collecting the units, I was a bit tied up with things at the time so didn’t have much free time and Alex kindly offered to go for me if I bought his ticket – I’m also sure part of the agreement was he would buy my half of the MDA JJ-CCR too but I don’t think we have that in writing.


Familiar faces from Anilao in KL!
Matti and Alex made a day trip to KL to pick up the units and bump into some familiar faces.  Despite entering and exiting the country within 12 hours and carrying back two large crates both Alex and Matti luckily managed to avoid the full body cavity searches normally reserved for ‘day trip with 1 way baggage’ travellers – good news for them but it would have made an awesome story and for that reason alone is actually a bit of a shame – maybe next time :-)


Freshly Opened Crates
Upon receiving the crate of goodies the first thing we all looked for was the new back mounted counter lungs, the suspense, excitement and intrigue slowly draining away as we realized - they weren’t in the crate – they’d be brought through to the Philippines by Randy Thornton, the CEO of both Subgravity and Hammerhead, who would be conducting an instructor trainer course for Mathew Partridge in the same week we would do our training.  I guess good things are worth waiting for!

Gear!
 The training dates finally arrived and we were lucky enough to have almost the whole of Acacia resort to ourselves for the whole week, with just myself, Matti, Mat and Randy the only guest for the majority of the week.  Sadly the weather wasn’t really up for working with us and some very heavy rain coupled with some strong winds made the shore diving from the resort akin to diving in chocolate milk…. with waves…. and big rocks to climb over on the way in.

Ironically the weather for the first two ‘dry’ days was pretty good, in fact by all accounts the visibility in Anilao was excellent, reaching 20-30m on most of the sites – except the house reef which seem to be lined up directly with the incoming waves.  We all got started on setting up out units together, except for Mat who’d clearly come more prepared (or cheated) and already assembled half of his unit back in Thailand.


New toys, new toys....
Building the unit up from scratch really helped in getting to know where all the parts go, although it was a little time consuming.  Our units were some of the first beta units as mentioned above so we had a few teething problems with hoses working and 1 or 2 missing parts – luckily we had Randy at hand with the worlds largest Hammerhead spare parts kit, based on future discussion everyone agreed it would be better to have the units pre-assembled at the Hammerhead factory to ensure everything works and fits, the student can then dismantle and rebuild the unit as part of the course.


The Hammerhead Extreme Head and Handsets
The quick connection bayonet attachments for the breathing hoses and bail-out valve are just awesome, that's all I can say – nothing else I’ve seen on other units comes close to these.  The new Extreme head is built like a tank and looks extremely solid, the option to open up the head and remove the sensor pod is a nice feature and makes drying out the head much easier.

Hammerhead Rev D Handset
We spent a few hours playing with the electronics and found some nice features, having Randy’s advice was a great help as he knows the unit inside out and gave us some neat short cuts and tricks regarding the controllers.  For reference, all three of us had gone for the new Rev D handset as the secondary display (to drive the new Extreme DIVA HUD) and the Rev C+ OLED handset for the primary as the OLED displace is much brighter than the Rev D display.


The only real problem we had with the unit set-up was some worries with the head on Matti’s unit – it seemed the solenoid just wouldn’t fire, but oddly if the sensor pod was removed it would start firing straight away.  This left all of us a bit confused as it clearly wasn’t the solenoid itself, but something just wasn’t working.  A few hours of thinking, playing and generally tinkering ensured but it turns out the problem was quite simple – the solenoid was switched off in the primary controller menu; an easy fix - once it’s diagnosed.  It did show a nice feature of the Hammerhead electronics, the solenoid will always fire if the PPO2 drops below 0.19 (removing the sensors propped the PPO2 to 0.00 on the controller), even in OC mode or when disabled – another nice feature is that the solenoid is disabled (unless the PPO2 drops below 0.19) once the controller is set to OC mode.  The new extreme DIVA HUD is very easy to read, looks well built and doesn’t obscure the view as other HUDs seem too – the clear body may have something to do with this.


Awesomeness
The first day ended with the unit completely assembled, bar the scrubber, and ready for use in the water the following day.  The resort was pretty much ours exclusively from this night onwards and the Acacia deserts were awesome, even more awesome than normal - almost as good as the new quick attachment bayonets I said earlier with the most awesome thing ever.  I had two.


Dry diving
Day two started bright and early with the packing and installing the sort and moving onto some briefing using Mat’s ART ‘MONA LISA’ method, head to toe checks and dry diving skills.  The skills on the Hammerhead are pretty similar to other units although it’s neat the O2 doesn’t actually need to be closed for bailing our or performing linearity checks if the controller is switched to OC mode.  The unit felt great but sitting in the sun with a heavy unit on your back isn’t the most comfortable position so getting into the water later that day was eagerly awaited.


I was a bit concerned on my first pre-breath as I was convinced I’d forgotten to put the scrubber into the canister – the radial scrubber coupled with the cooper hoses and back mounted counter lungs made this the beat breathing unit I’ve ever used, period.  And by far.  I kept retracing my steps and managed to convince myself I hadn’t forgotten to but in the scrubber – I did double check with Matti too though, it really breathes that well.  The new back mounted lungs initially looked very similar to what I had on the JJ, however it soon becomes evident they are quite a lot larger, this seems to have a big affect on the work of breathing and will have less problems with larger canister lights or inflation bottles reducing the lung volume as can be a problem on the JJ.

The make up of the lungs themselves looks solid, the two minor comments we had were that the velcro straps for the harness shoulder strap connection could be a bit thicker to help manage the hoses (all of us ended up using additional wraps/bungee to keep the hoses neat and tidy); also the velcro seems to be the wrong way around, the hook side can eaily end up against your neck which becomes a bit sore after a few days - minor issues only though and Randy seemed to think this would all be fixed in the next batch!

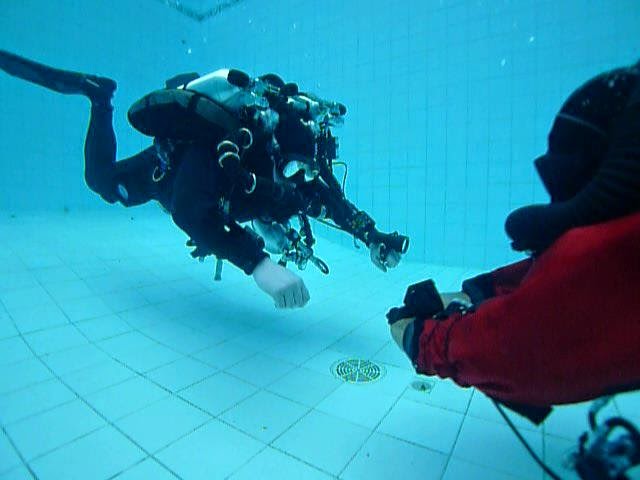
The pool skills went relatively smoothly, the unit is well trimmed even with steel tanks and a wetsuit in fresh water; another pleasant surprise.  We’ve both trained with Mat before, anyone who doesn’t know of Mat, in short, he’s absolutely top notch, knowledge, experience and skills – Mat has everything and I don’t think we’d even think about learning with anyone else.


It was getting a bit late and the weather was looking a little rough by the time we finished so we decided to spend a bit more time in the pool then do some theory work and hit the sea the following day; we still had plenty of time to finish things off in the remainder of the week.  The deserts were again awesome, I had two again.  We also had the chance to talk a lot more with Randy and got to hear some of the amazing dive stories, the Papua New Guinea trip and the Whale slapping incident and resulting medical treatment were just incredible to hear first hand.


Theory
The next morning started bring and early, well, dark and early as the AC un it in our room decided to go crazy around 4am, then we realized it was actually the rain; heavy doesn’t even come close to describing it.  A few minutes later lightning struck somewhere really close to the room that me and Matti were in, the floor was shaking for a few seconds after that.  By the time the sun came up all of us were already awake and took and early breakfast, the rain had stopped but the shore entry didn’t look good; run off from the heavy rain had turned the shore line to a light brown soup which wasn’t going to work for diving.


Pool skills done - check
Given the conditions we decide to use the pool for more skills, as both of us had already learned on similar units it was good just to get some practice on the skills specific to the unit and how the unit felt while operating it.  Sadly the weather didn’t improve much so we had an earlier finish for the day and saved ourselves for the following day; as expected desert was awesome – I had three this time as Alex had left and they had made one for him already.


Jeepney
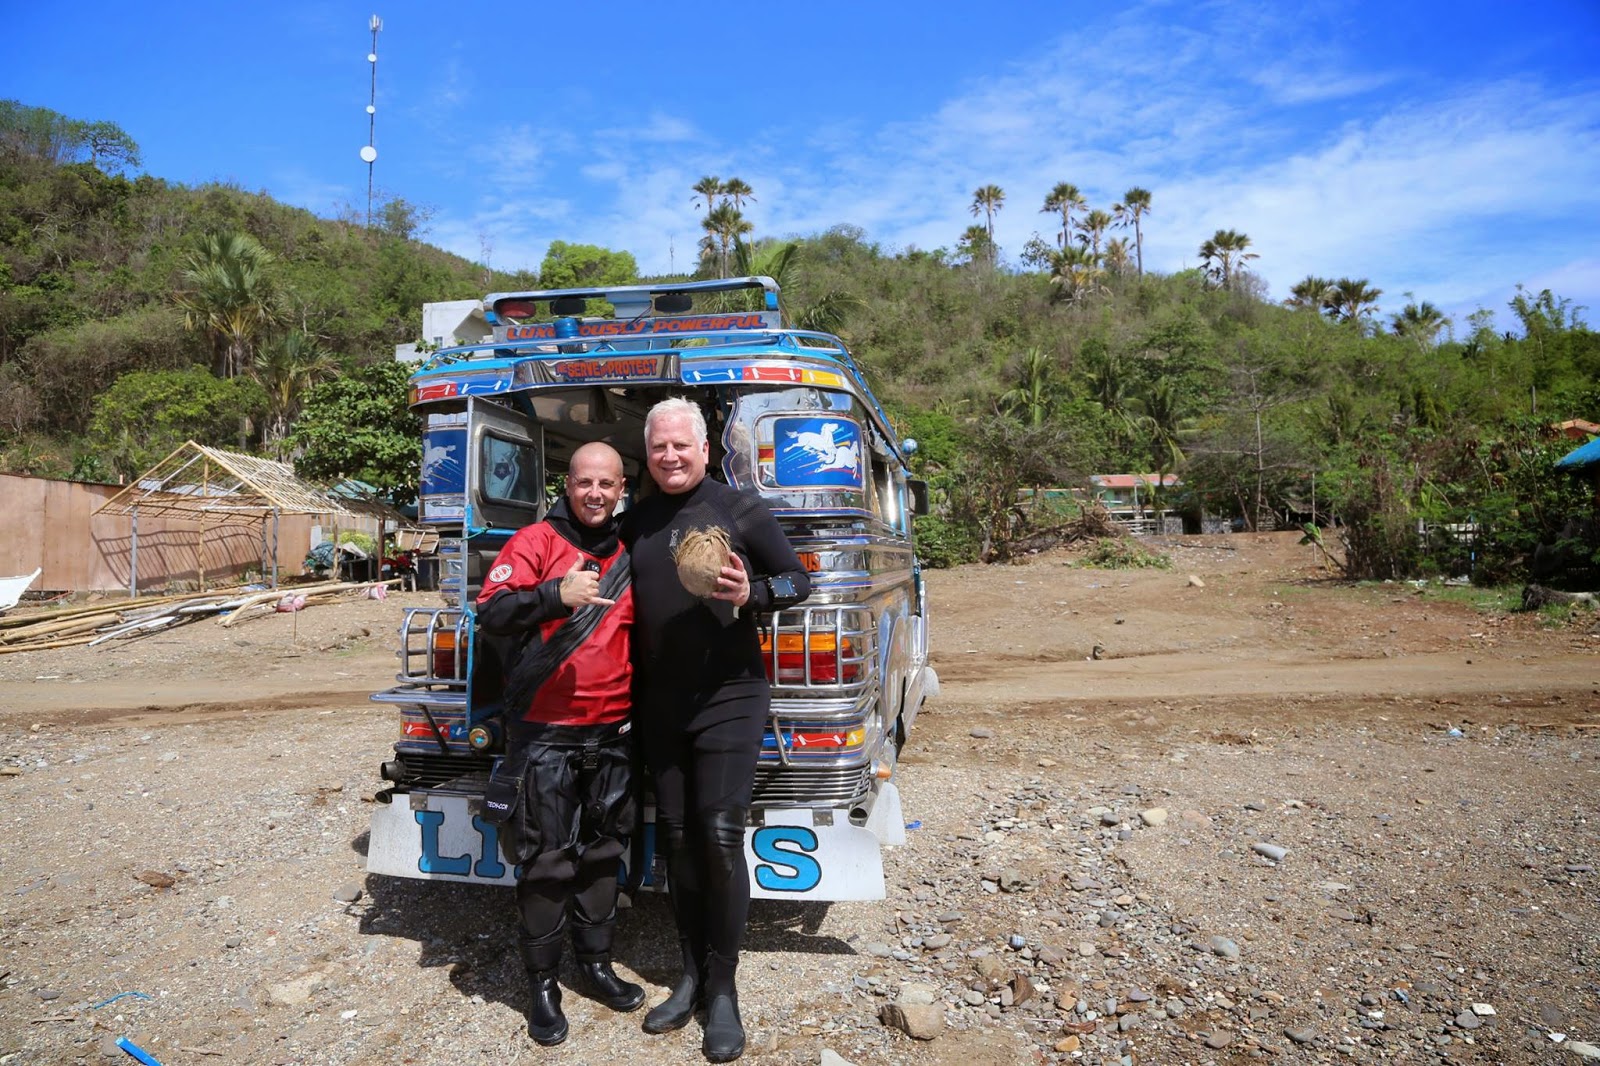
The following day arrived without heavy rain but the shore entry was still looking a little wavy.  We all decided it was best to head to the other side of the Anilao peninsular as we’d be sheltered from the waves there.  This gave us the opportunity to show Mat and Randy something pretty unique to Philippines diving, the jeepney dive transport – basically a rented jeepney used to take the dive gear from Acacia resort over to Secret Bay as the sea was a bit rough in front of Acacia – it’s about a 10 minute drive between the two locations.


More Jeepney
We were a bit late in setting off as the jeepney and rebreather combo was too much of a good opportunity to miss and we spent a bit of time getting pictures.  The engine not starting and smoke filling the cabin at the first attempt to start was a little worrying but we were assumed it was no problem.  The second attempt involved removing the passenger seat to access the battery, this time the engine didn’t start again but we didn’t get too much smoke, just big flames – not looking good.  The third time it worked fine and started without any problems, everyone looked happy although we were a little unsure given the smoke and fire a minute earlier – we all sat near the back door exit for the trip there.

No Waves in Sight!
Arriving at Secret Bay we were happy to see it was like glass and not a single wave in sight.  We made two long dives with Mat and Randy covering the skills we’d been practicing the previous day – all went well with the exception of no one bringing sunscreen and everyone getting a little burned.  The trip back on the jeepney was a little less uneventful with no fires or even smoke this time, we still all say close to the rear exit though.

Another awesome desert (I think I only had one this time though, I ate too much other food before desert) and stories and we all called it a night.  The following day was Randy’s last day at the resort before heading back to Manila so he left his gear to dry out while we did a few dives from the front of the resort to close out the course skills.  We had a last meal with Randy in Anilao before he left for Manila to catch an early morning flight back to the US.


We’d already closed out the course skills in the previous days so spent the final day on some fixable and non-fixable failures specific to the Hammerhead unit.  These exercises with Matt really highlight where the thought process of CCR diving come in and how the CCR units gives us so many more options that OC would.  The only down side I can see to this unit as things stand is the back mounted counter lungs tend to close-up in a head down position, making breathing very difficult, especially with a minimum loop volume.  This has been partially addressed using a small hose wrap straw although the breathing even with this is very difficult.  We're going to play with some options using perforated larger diameter garned hoses inside the lungs to see how they work - we'll post an update shortly.  It's pretty unlikely we'd be spending much time upside down but you never know how you can end up in a tight wreck or cave dive so we'd rather know we can solve this one before getting into a similar situation in an overhead environment.


Randy and Mat
I haven’t gone into the skills in detail but if you’re looking for a top CCR instructor I think we were lucky enough to have two of the best in the business in Randy and Mat.  I was particularly impressed with how Randy listed to any feedback we had and looked to take things onboard, the units we had were effectively beta units after all but still work better than any other rebreather I’ve tried to date – it’s now 100% my unit of choice and as a result I’m actively looking to sell both my UTD MX and hopefully sell my half of a JJ to Alex.


The course was a blast from start to finish and both myself and Matti are now keen to rack up the additional hours on the units with the goal of teaching it at some point in the future – you’ll be seining us a lot on these units!

Huge thanks go out to Randy and Mat, it's a honour to get to use some of the run of first units out of the factory and to learn from two of the best CR divers in the business.  Thanks also to Acacia who (as always) provided a great base to dive from, and just in case it wasn't mentioned earlier - awesome deserts!